TinkerCad
Model a Tower of Hanoi Game
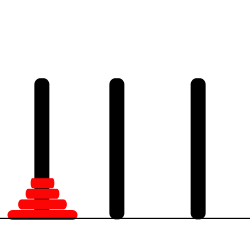
In an ancient city, monks in a temple have the task of moving a pile of 64 sacred disks from one location to another. The disks are fragile; only one can be carried at a time. A disk may not be placed on top of a smaller, less valuable disk. And, there is only one other location in the temple (besides the original and destination locations) sacred enough that a pile of disks can be placed there.The Towers of Hanoi is a game where various sized disks are piled up on a base in order of decreasing size. The object of the game is to move the stack from one base to another, subject to two rules:
- Only one disk can be moved at a time
- No disk can ever be placed on top of a smaller disk.
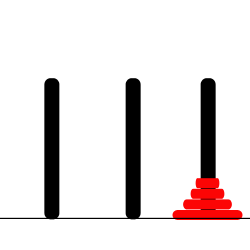
If there are N disks on the first stack, you know that you will eventually have to move the bottom disk from that stack to the next stack. Before you can move the largest disk from the first stack to the bottom of the second stack, the first N-1 disks must be on the temporary stack. Once you've moved the N-th disk to the final stack, you must move the other N-1 disks from the temporary stack to the final stack to complete the solution. But moving N-1 disks is the same type of problem as moving N disks, except that it's a smaller version of the problem. In the recursive subroutine that solves the problem, the stacks that serve as the source and destination of the disks have to be specified. It's also convenient to specify the stack that is to be used as a spare, even though you could figure that out from the other two parameters. The base case is when there is only one disk to be moved. The solution in this case is trivial: Just move the disk in one step. Here is a version of the subroutine that will solve the problem:
 TowersOfHanoi(int disks, int from, int to, int spare) {
   if (disks == 1) {
          // There is only one disk to be moved.  Just move it.
      //"Move a disk from stack number "+ from + " to stack number " + to);
   }
   else {
         /* Move all but one disk to the spare stack, then
            move the bottom disk, then put all the other
            disks on top of it.*/
     //TowersOfHanoi(disks-1, from, spare, to);
     //"Move a disk from stack number "+ from + " to stack number " + to);
      //TowersOfHanoi(disks-1, spare, to, from);
   }
}- Create a new Project
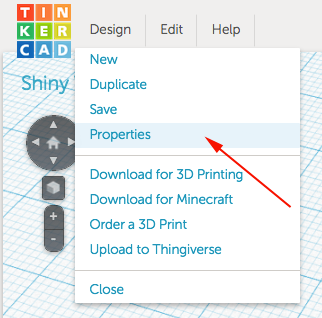
- Click on the Design Pulldown and select Properties and name your project.
- Model
- Model one disk and print it. Make sure it can be added and removed from the stacks. The model shrinks a little bit when printed.
- Download the stl or Upload to Thingiverse.
- Open Google chrome, or another webGL enabled browser.
- Navigate to Tinkercad.com.
- Sign in using your username and password or sign up.
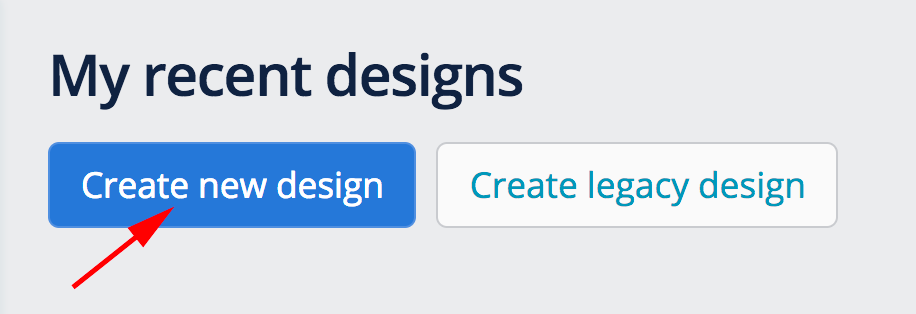
- Click on the Create new design button:
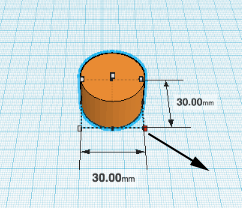
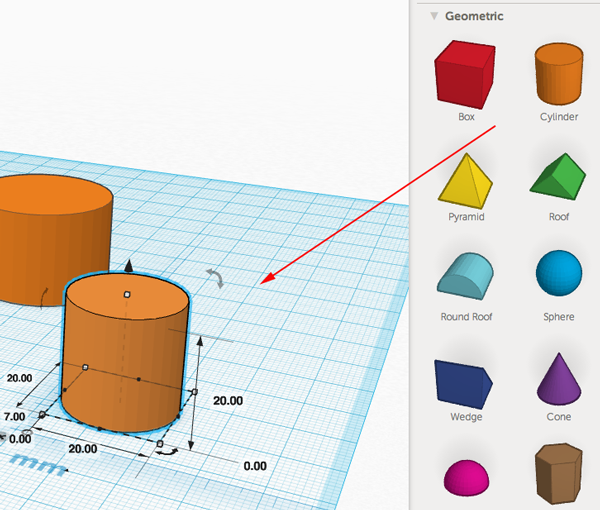
- The first part to design is the cap. Make a cylinder 30 x 30 x 20.
There are 2 ways to do this:
Option 1
- Drag a cylinder from the left on to the workplane:
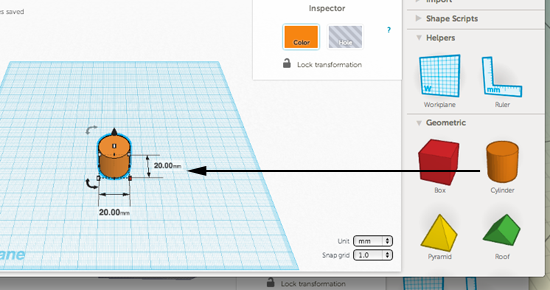
- Drag the node out to adjust the x and y dimensions:
Option 2
- Drag the ruler on to the workplane and adjust the x value first. Press tab to make the next adjustment
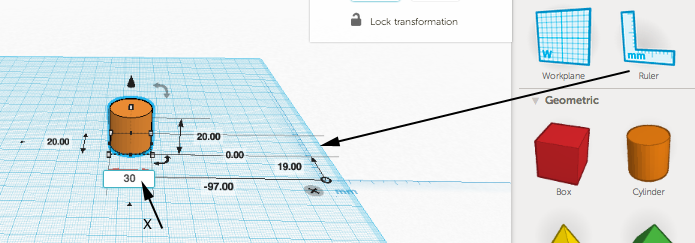
- Press tab to make the next adjustment:
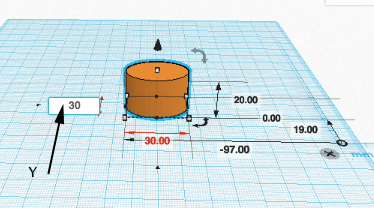
- Press tab to make the next adjustment:
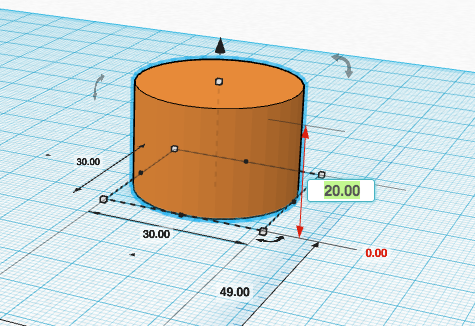
- Drag a cylinder from the left on to the workplane:
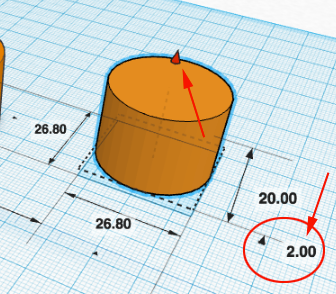
- Drag another cylinder on to the work plane. This will become the hole:
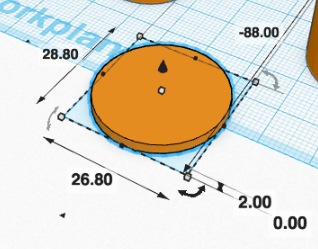
- You want a wall thickness of the box to be 1.6mm. So 2 x 1.6=3.2 and 30-3.2=26.8.
Set the x to 26.8, the y to 26.8 and the z to 20:
- Click and drag the black cone so that the cylinder raises 2mm off the workplane:
- Click on hole icon to turn the cylinder into a hole:
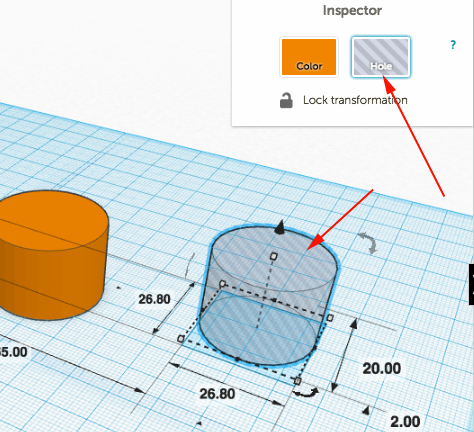
- Select both cylinders:
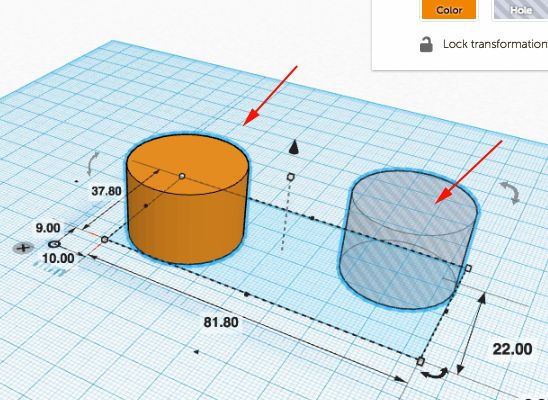
- Click on Adjust and select Align:
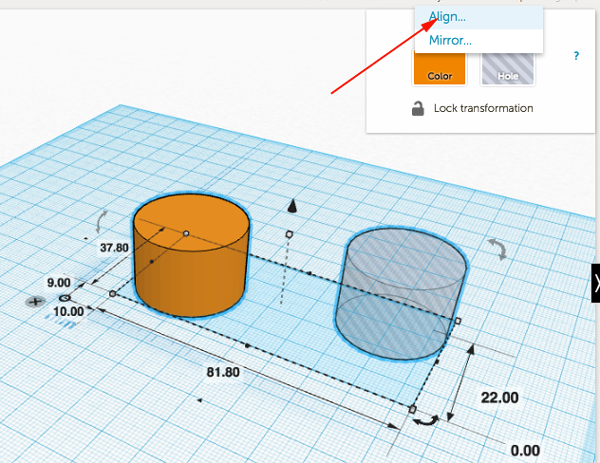
- Click on the center nodes to align the objects:
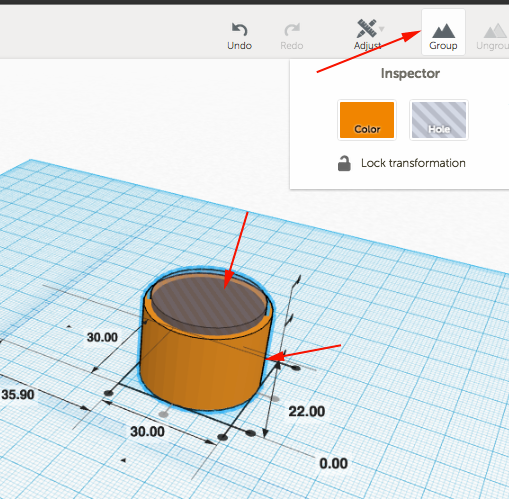
- Make sure both cylinders are selected then click on group to make the hole:
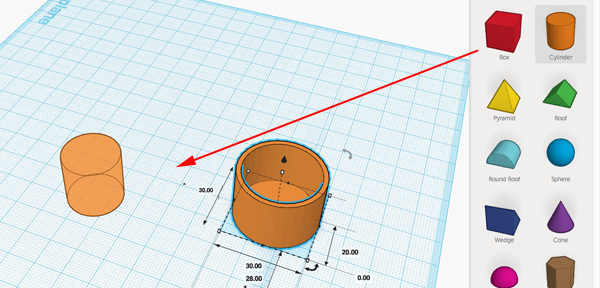
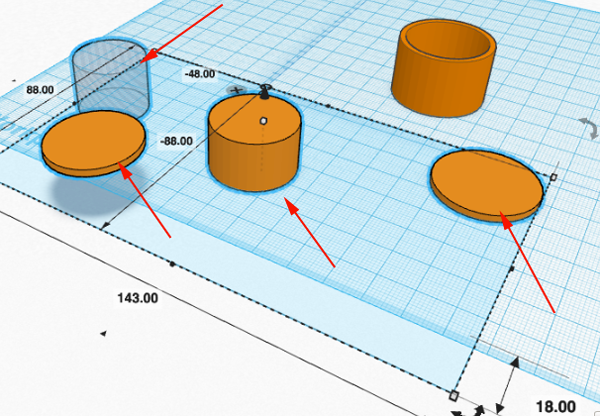
- Drag another cylinder on to the workplane:
- Set the x to 30, the y to 30 and the z to 2. This will be the base of the top:
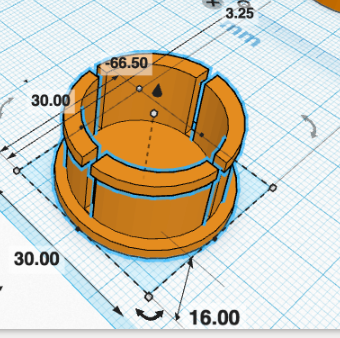
- Drag another cylinder and set the x to 26, the y to 26 and the z to 16. This will be part of the top.
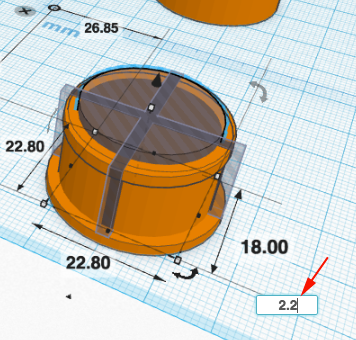
- Drag another cylinder onto the workplane. This will become a hole in the top. Set the x to 22.8, the y to 22.8 and the z to 18:
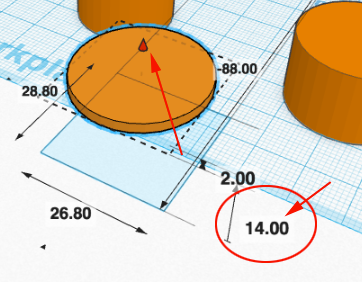
- You need to create a rim on the top for friction. Drag another cylinder out and set the x to 26.8, the y to 26.8 and the z to 2:
- Click on the black cone and drag up until this disc is 14mm off the workplane:
- Select the last four cylinders by Shift+left clicking each of them:
- Align the cylinders:
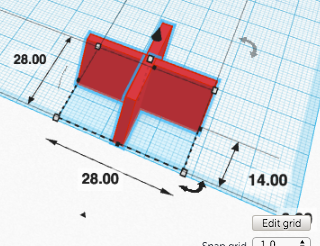
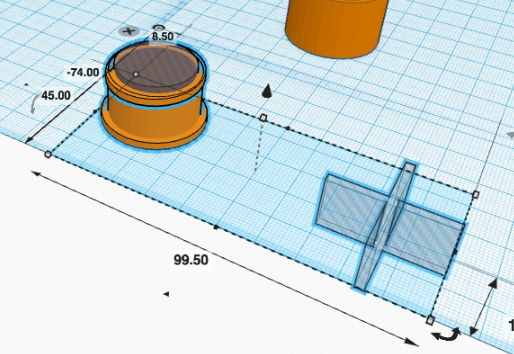
- Drag a cube onto the workplane and set the x to 30, the y to 2 and the z to 14:

- Make a duplicate of the cube by pressing Command+D.
- Rotate the duplicate 90° (hold the SHIFT key while you rotate to confine the move to 45° increments):
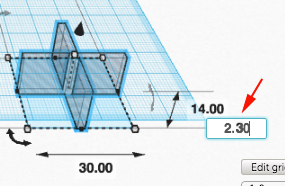
- Convert the two cubes into a group and then into a hole. Raise the hole up 2.3mm:
- Align the cross with the cylinders:
- Raise the central cylinder (the hole) up 2.2mm:
- Select and group all the pieces of the cap to convert the cross and central cylinder to holes:
- Use the align tool to align the top and the bottom parts of the box. Then move them closer to each other:
- Select Properties from the Design Menu:
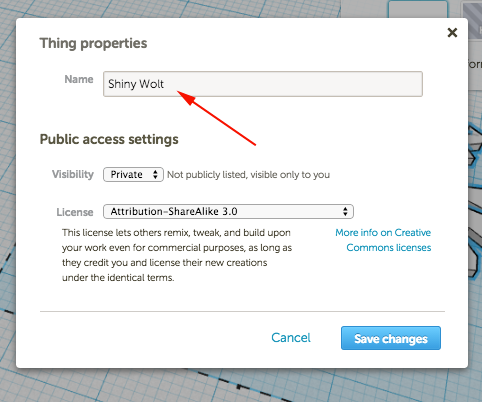
- Rename the model something that is more meaningful to you then the randomly generated name:
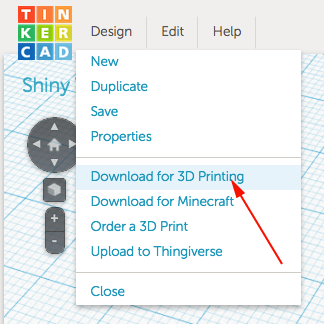
- Select Design→Download for 3D Printing
- Select STL
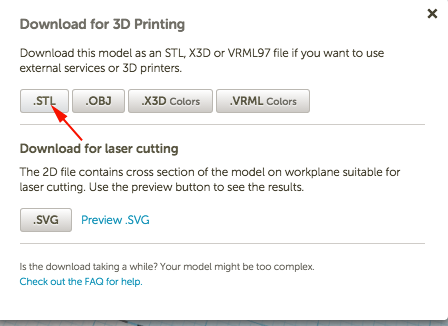
- Print!
