Tutorial
Solid Models in Sketchup
What is it?
In order to 3D print your models, they must be solid, watertight , manifold. The model must not have any extra lines or faces. If you make your object into a group or component, Sketchup will let you know if it's solid by opening the Entity Info dialog box. Click on your model and open Window>Entity Info.What's the tutorial?
Making Your Model Solid
- Open SketchUp
- Create two separate grouped objects:
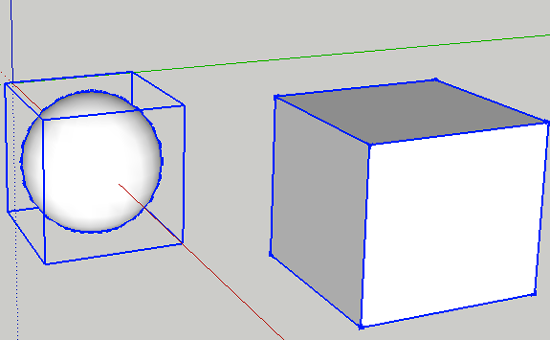
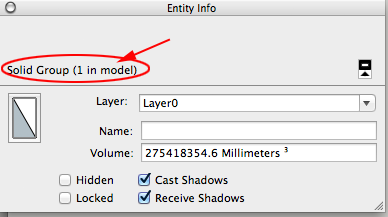
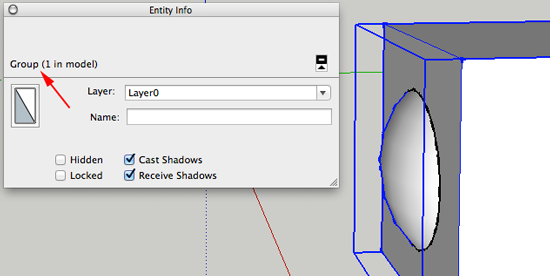
- Click on a Group and open the Entity Window by clicking Window>Entity Info. Right now each group is solid.
- Move the groups together so that they intersect each other. You may need to scale one of your groups

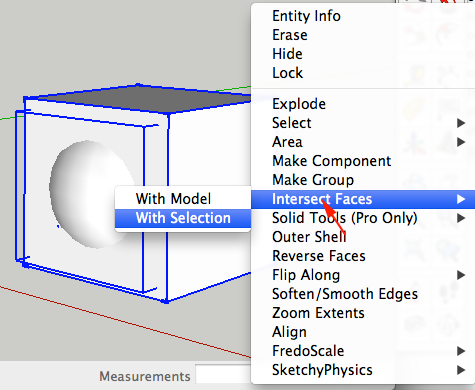
- Select both groups and CTRL+click on them. Select Intersect Faces>From Selection from the Context Menu:
- Select both Groups and CTRL+click. Select Make Group from the Context Menu. Open the Entity Info> you'll see that your model is no longer solid:
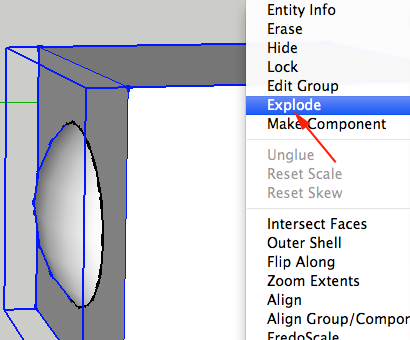
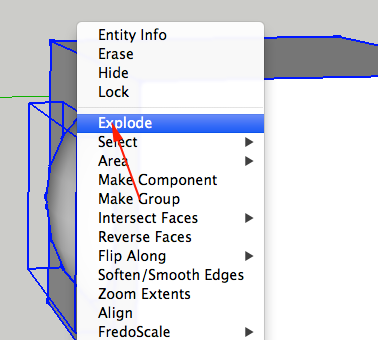
- CTRL+click on the Group of groups and select Explode from the Context Menu:
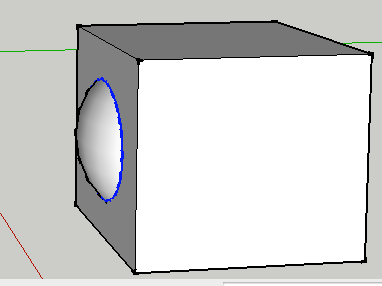
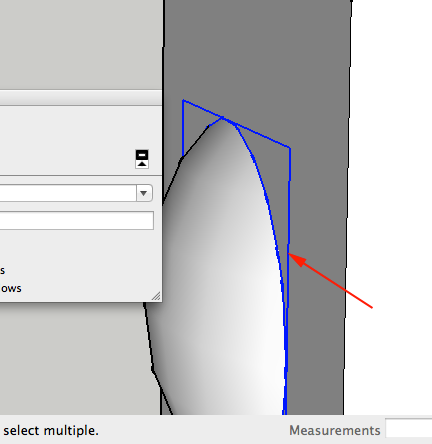
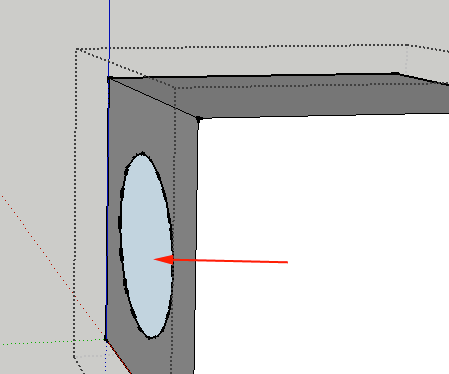
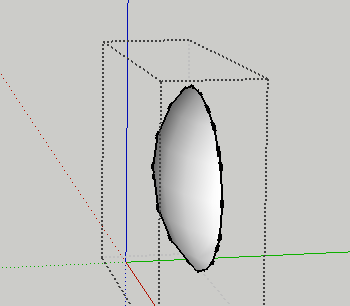
- Select the ring:
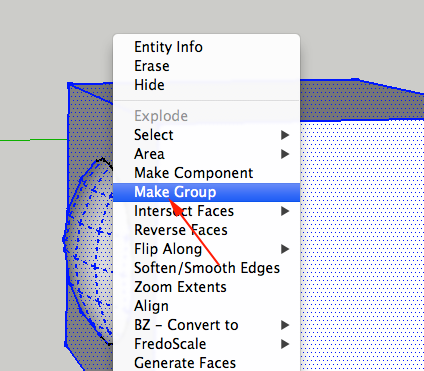
- CTRL+click on your selection and choose Make Group from the Context Menu:
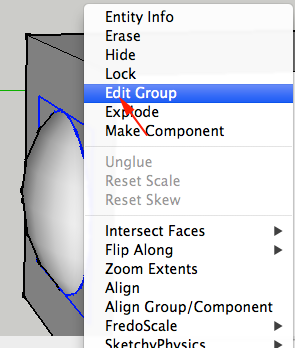
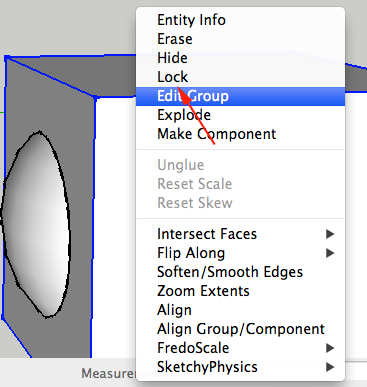
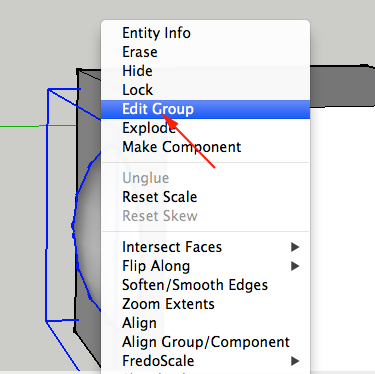
- CTRL+click on this group and select Edit Group from the Context Menu
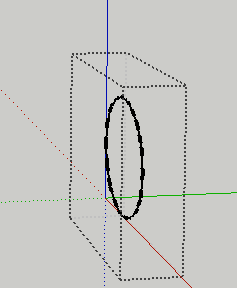
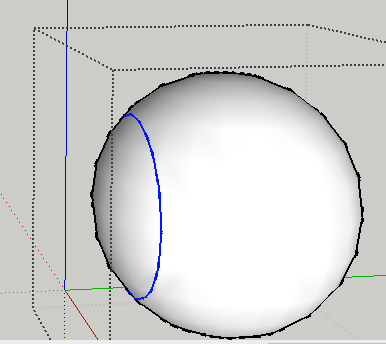
- If your ring doesn't look like this:
Go to View>Component Edit> and select Hide Rest Of Model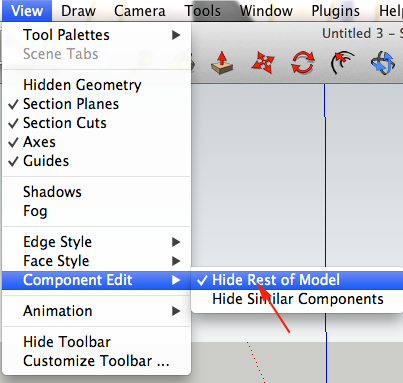
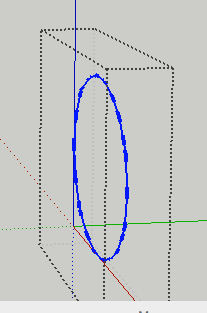
- Select the entire ring:
- From Edit menu select Copy
- Click outside of the grouped box to bring the other entities back. Select the ring group and hit DELETE to erase it:
- CTRL+click on another entity and select Edit Group from Context Menu:
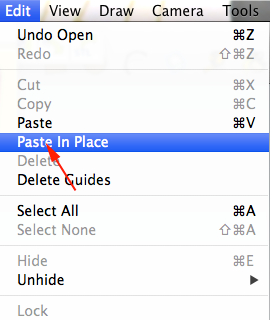
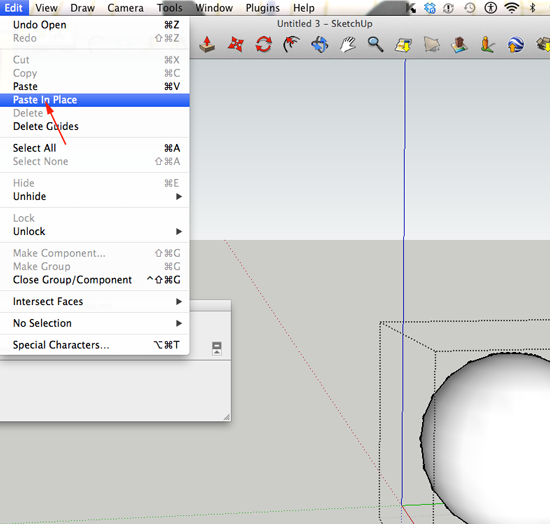
- Select Paste in Place from the Edit menu:
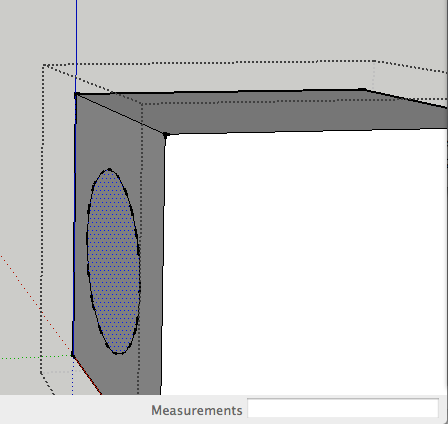
- Select the interior of the ring:
- Delete the interior
- Click outside the box and CTRL+click on the other Group. Select Edit Group from Context Menu:
- Again, select Paste in Place from the Edit menu:
- Delete the unwanted faces:
- Click outside the group. Select both groups and CTRL+click on them and select Explode from the Context Menu:
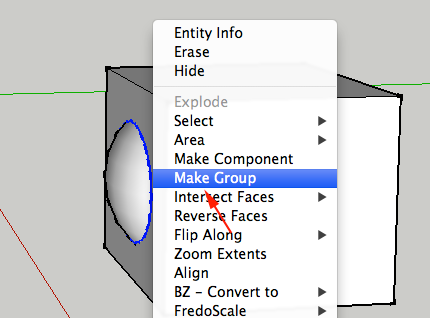
- CTRL+click on them and select Make Group from the Context Menu:
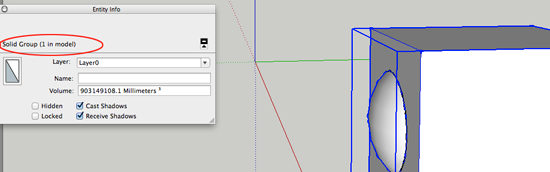
- Open Entity Window. You should see that you now have a Solid Group:
Now what?
- Create a solid model with a series of grouped objects.
